Case 885B, 885B DHP, 885 VHP, 885 AWD Grader Service Manual
$34.00
Case Grader Service Manual
Included Manuals: Comprehensive service coverage with two manuals spanning 1223 pages and 1855 pages.
Brand: Case
Model: 885B, 885B DHP, 885 VHP, 885 AWD
Type: Grader
Manuals: Service Manual
Publication Numbers: 71114392 (Oct 2011) & 48050419D (Oct 2017)
Language: English
Format: PDF
Comprehensive Guide to Replacing Friction Pads
Product Overview
This guide provides detailed instructions on how to replace the friction pads of a vehicle’s braking system efficiently and safely. Maintaining your braking system is crucial for ensuring safety and performance. By following these instructions, you can replace worn-out friction pads with new ones, ensuring your vehicle remains in top condition. It’s important to note that friction pads should always be replaced in pairs to maintain balance and efficacy.
Key Features
- Detailed Step-by-Step Instructions
- Clear Indications of Friction Material Type
- Includes Tips for Safe Removal and Installation
- Instructions for Proper Alignment and Adhesive Use
- Screw Torque Specifications Included
Benefits
- Ensures Optimal Braking Performance
- Increases Vehicle Safety
- Prevents Uneven Brake Wear
- Extends the Longevity of Your Braking System
- Reduces Maintenance Costs Over Time
Usage Recommendations
- Always check the code stamped on the new friction pads to ensure they match the type of the old ones.
- Use caution when removing the friction pads to avoid damaging the plastic actuator cover.
- Align the flat on the lever side pad with the flat on the plastic rotor cover for proper installation.
- Clean existing pad glue from the pad compartment before placing new pads.
- Properly torque all bolts according to the equipment’s service manual, ensuring secure installation.
Instructions
Step 1: Expose Brake Pads
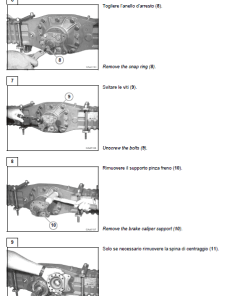
Release the brake and disconnect the actuator from the brake lever. Remove one brake mounting bolt and swing the brake up over the disc to expose the brake pads. In tight spaces, remove the brake from the vehicle. Carefully pry out the used pads with a flat blade screwdriver, taking care not to damage the plastic actuator cover.
Step 2: Install New Friction Pads
Position the new friction pads correctly. Snap the lever side pad over the plastic snap tabs of the actuator cover, ensuring alignment. If tabs are absent, apply silicone gasket adhesive to the pad’s back edge, aligning it properly. Clean the pad compartment of old glue, apply adhesive to the carrier pad, and press it into place.
Step 3: Finalize Brake Installation
Swing the brake over the disc, install the mounting bolt, and tighten all bolts per the service manual’s torque specifications.
Step 4: Adjust Linkage and Torque
Unbend the anti-rotation clip’s tab, loosen the screw, and adjust the lever’s position as advised in the manual. Torque the screw to 110-140 in.lbs. (12.4-15.8 Nm), secure it with the anti-rotation clip, and attach the actuating cable. Adjust the pad gap accordingly.
Only logged in customers who have purchased this product may leave a review.



Reviews
There are no reviews yet.