Installation of Powered Rear Axle
Product Overview
The powered rear axle is an essential component for maintaining the stability and performance of machinery. This guide provides detailed instructions for installing the rear axle and stabilizer to ensure reliable operation. Follow these step-by-step directions to correctly fit and secure components, maximizing efficiency and wear resistance.
Key Features
- High-torque stabilizer mounting: 705 u2013 868 Nu00b7m (520 u2013 640 lb ft)
- Durable self-locking nuts for stabilization
- Precise alignment for stabilization pins
- Robust drive shaft installation
- Lubrication fittings for easy maintenance
Benefits
- Ensures optimal machine stability and performance
- Reduces wear on components with proper torque application
- Facilitates easy maintenance and long-term reliability
- Enhances safety with regular brake testing procedures
Usage Recommendations
- Ensure bushings are properly fitted to maintain stabilizer level.
- Align stabilizer holes with rear chassis before securing pins and nuts.
- Connect lubrication hoses and brake tubing securely.
- Regularly check and tighten axle and wheel nuts every two hours of operation.
- Lubricate linkage points with Akcela molybdenum disulfide for smooth operation.
- Test brakes thoroughly by referring to Section 7001.
Manual Extract: Powered Rear Axle Installation Procedure
- If the bushings have been removed, fit new bushings level with the stabilizeru2019s outer surfaces.
- If the stabilizer is detached from the axle, mount and torque the mounting bolts to 705 u2013 868 Nu00b7m (520 u2013 640 lb ft).
- Position the stabilizer and axle assembly under the machine.
- Align holes in the stabilizer with those in the rear chassis and fit pins with washers facing the correct direction.
- Secure self-locking nuts on stabilizer pins, applying torque of 542 u2013 678 Nu00b7m (400 u2013 500 lb ft).
- Connect lubrication hoses to the stabilizer pin fittings.
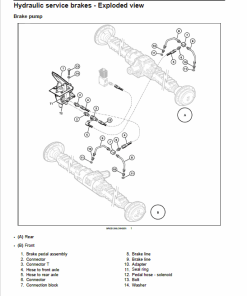
- Attach the brake tubing hose to the rear axle adapter.
- Install the drive shaft and torque nuts to 54 u2013 74 Nu00b7m (40 u2013 55 lb ft).
- Fit wheels and torque nuts to 515 u2013 569 Nu00b7m (380 u2013 420 lb ft).
- Lubricate the stabilizeru2019s linkage points with Akcela molybdenum disulfide.
- Idle the engine and conduct brake tests.
Note: Every two hours, ensure nuts on axle and wheels are torqued to specified values until stabilized.
Only logged in customers who have purchased this product may leave a review.
Related products
$32.00
$33.00
$34.00
$33.50
$34.00
$34.00
$34.00
$34.00





Reviews
There are no reviews yet.